facebook twitter instagram
  • Home
  • About
Powered by Blogger.

                               kyriasabah

    • Home
    • ABOUT
    • CONTACT


Hello Insta Lovers!

I always loved a well-planned feed, because I love the visuals of it and of course  OCD. There is just something very catchy about nice feeds. Here are a few super easy and great looking insta feed ideas.
Remember, your Instagram theme is a reflection of who you are and what you love. Don’t feel like you have to stick to “rules”. There are no rules. You make your own rules. The secret to making a beautiful theme is to love what you share and stick to your style
Let’s do this !

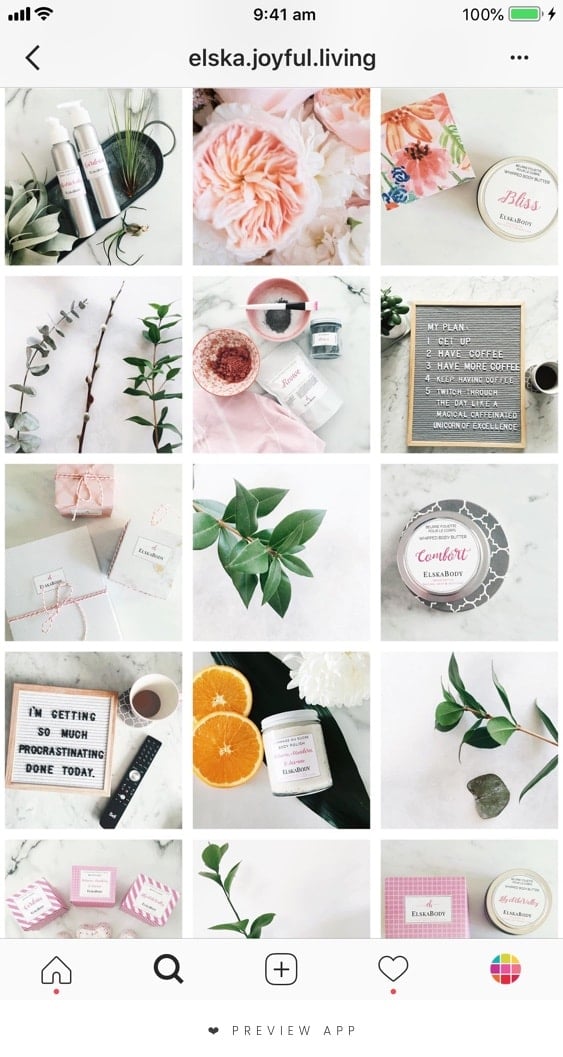
1. Line in the middle theme

The Line in the Middle is usually made of quotes on a white background. However the Line in the Middle can be another color or any other theme you want. The line will guide your viewers as they scroll.
This is the easiest and very classic as well. You can avoid clutter on your gram.
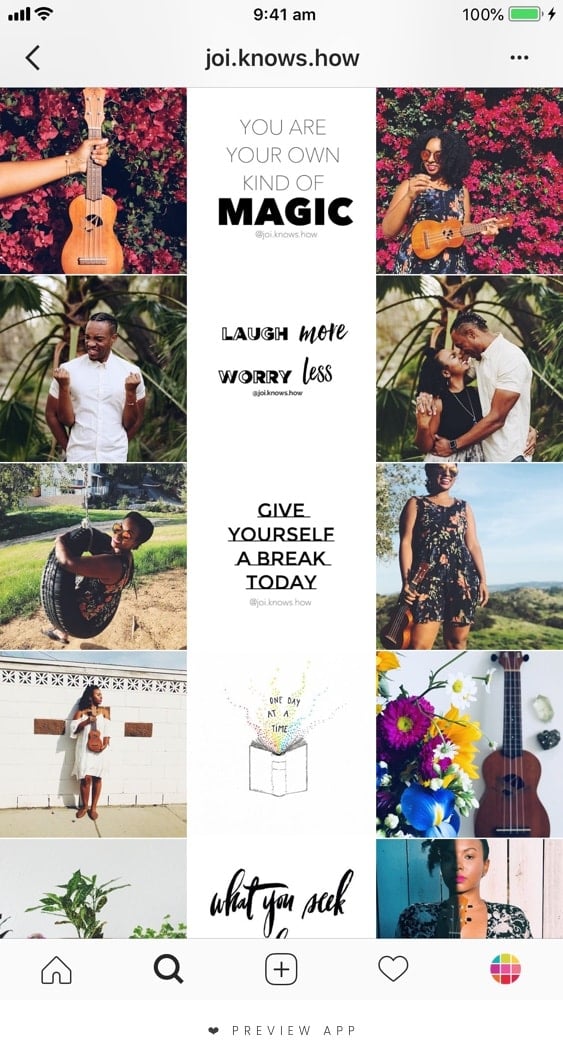
2. Row Theme

This theme is great for fashion bloggers as they can tell stories or plan their feed according to their outfits.
Three in a row serves a great way to put your pictures as well as makes the feed look great!
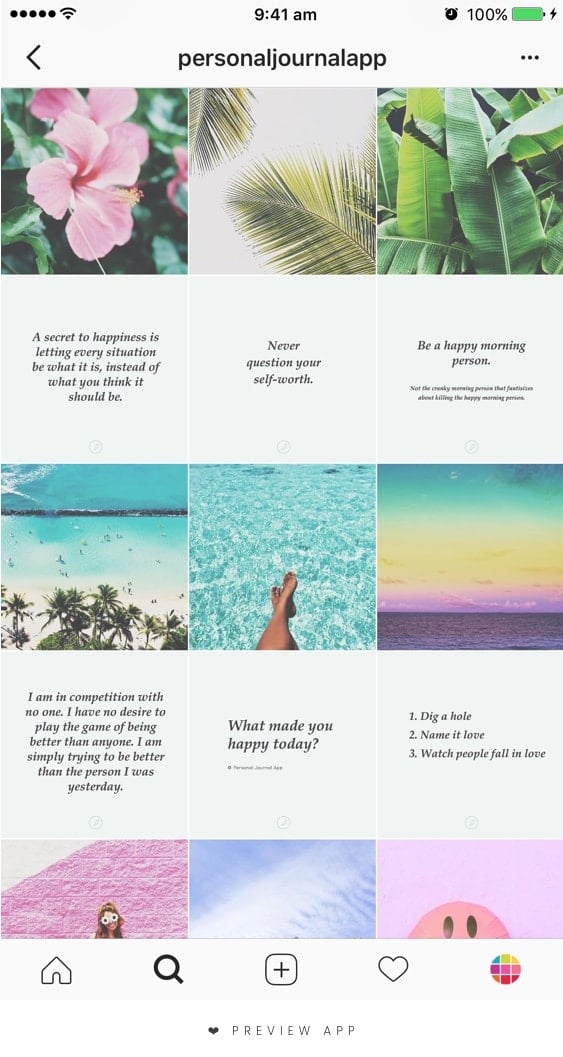

3. Tiles Theme

The most famous way to achieve the tiles theme is to alternate our photos with quotes/art or more. Something to balance out the color variation.
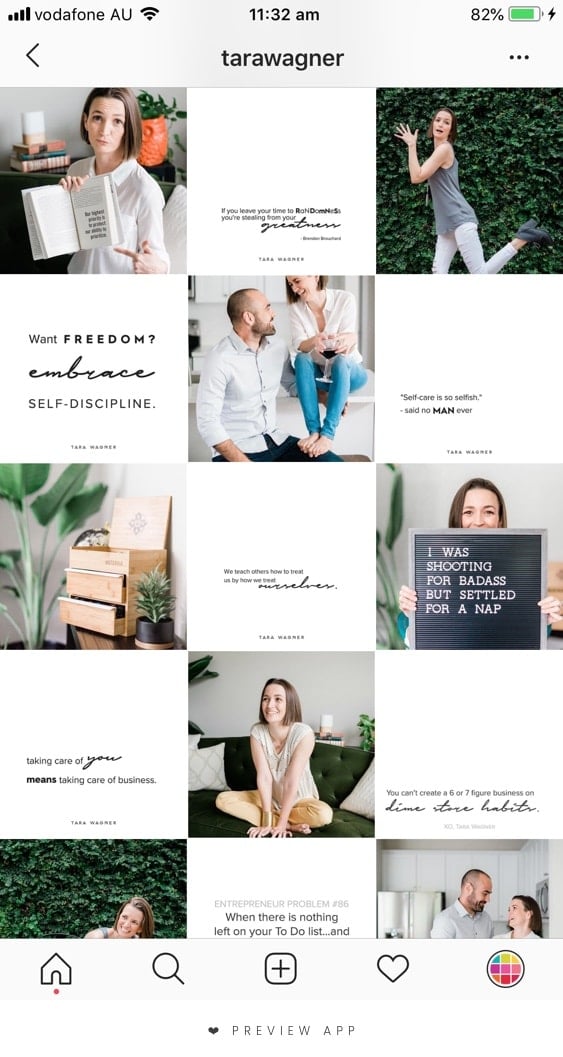

4. Same filter Theme

This one is my personal favourite as you can post any picture of your liking and add the same effect to it to make it fit into your feed. This way your entire feed look uniform and aesthetic.
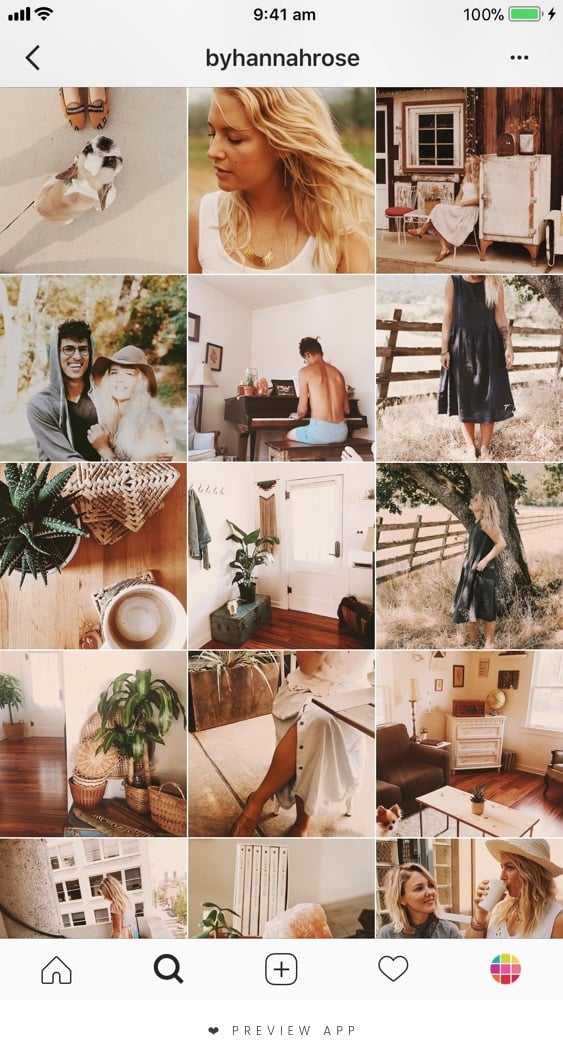

5. The 9 Rule

This is my feed theme, basically a combination of different feed ideas. As my filter likings keep changing and I personal don’t like just one color on my feed. I use the same effect on 9 photos and also alternate them between portrait and abstract pictures.


6. Border Theme

Great theme idea for photographer and lifestyle bloggers. Add a border with a thickness of your liking. This way regardless of the colors and variety of photos your feed will look fantastic!
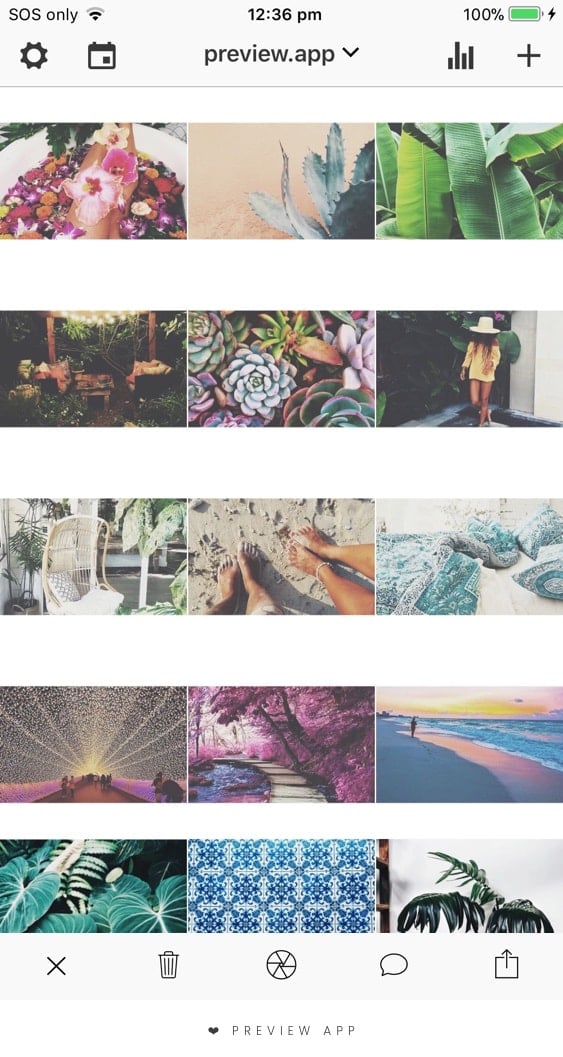


All these theme ideas some with pre-planning. It might sound complicated but, it is upper easy! You can check out my IGTV tutorial on how I plan my feed CLICK HERE to watch.

 Until next time


Polý agape (lots of love) and stay cheerful :)


Share
Tweet
Pin
Share
6 comments


Hey Hey ! A blog post after long . 

I have been posting really cool tutorials on my IGTV for the past three weeks. CLICK HERE  to have a look. 
I absolutely love DIY projects that transform utilitarian everyday objects into unexpected works of art. Not only do these become fantastic conversation pieces in your home, they also allow you to create super budget-friendly art that doesn’t feel too “crafty.” And most of all, it just looks freaking awesome and oh so mid-century-modern-Mad-Men-ish up on the wall.
I was thinking about additional three dimensional art pieces I could DIY. I wanted something that would add texture, warmth and angles.

LEGGO

You’ll need:


Popsicle sticks (I used 200 for three frames), glue gun, spray paint/paint, hexagonal stencil.
Step 1 : Print out a hexagonal stencil or make one yourself using a compass.
             Measure the length of your popsicle sticks and draw this flower pattern. Join the end of the petals to create a hexagon. This step is just to make sure all your hexagons are similar.


Step 2: Tape your top and bottom sticks on to the sheet to avoid drifting. Once the shelf is made, the tapes can be removed easily.


Step 3: Use a glue gun to glue both the ends of each Popsicle firmly. Keep stacking till you attain the depth you desire.


Step 4: Spray paint/ paint to your liking.


Step 5: Hang the shelves up with the support of nails/hooks.


Step 6: Place any cute decor piece in the shelves.


There you go, you’ve got yourself a super


Until next time


Polý agape (lots of love) and stay cheerful :)


.

Share
Tweet
Pin
Share
1 comments


HELLO Hello

I am hoarder and I can’t let go of things easily . After my long vacay , I came back to a wardrobe full of clothes and needed to make space for my new ones. Whilst sorting I thought I should go through the stuff and do a declutter. It was super hard for me but, here is how I managed to get through and you can too.

STEP 1:

Empty cupboards\ drawers onto the ground.
This gives an all-encompassing view of all the stuff you’ve been hoarding. This step will let  you mind map all the stuff you want to continue having and things you don’t.

STEP2 :

Divide all contents into categories.
Separate into piles; shoes, shirts, skirts, pants, scarves, socks and however you want to sort . this aloows you to decide easily where to station them .  

STEP3:

Apply the one year rule.

Be 100% real with yourself. Recruit a friend for support if you have difficulty letting go.You haven’t reached for something in an year ? kiss it bye!

STEP 4:

Invest in organization

It’s time to adult. We’re talking thinner hangers, fabric boxes and clothing hampers. Having a place for everything= cleaner room with less effort to keep it that way. Basically when everything has a box it is automatically cleaner and so much more easier to locate.

STEP 5:

Divide things you are getting rid of

-          TOSS : worn out, damaged or stained items.
-          DONATE: wearable items with a decent resale value.

There you go! This should help you get decluttered and organized super-fast. I kept this post super short and crisp so that it is relatable. Hope you guys found it helpful.

Until next time


Polý agape (lots of love) and stay cheerful :)


Share
Tweet
Pin
Share
3 comments


Hello Folks !

A  D I Y post after a while. As we are travelling and need to carry our brushes along, Me and @_theartisticside got together to make this super cute, compact and easy brush holder.

 Leggo!!!!!!!!!!!!!!!!

You’ll need:


Step 1:

Fold the cloth into half vertically and measure if your brushes align properly . Adjust our cloth accordingly.


Step 2:

If you don’t have a long cardboard piece like I do. Then tape them together.


Step 3:

Fold then into minimum 4 sections. These creases help in easy folding.


Step 4:

Iron the cardboard to make the creases fine.

Step 5:

Use a hot glue gun and secure the top of the cloth , keep the sides open to insert the cardboard .


Step 6:

Insert the cardboard from either side .


Step 7:

Place your brushes in order of choice and distance them accordingly. Avoid placing brushes on the folds.


Step 8:

Hot glue the elastic after measuring the width of the brushes ( as they may vary).
Here is a video of this step


VOILA you have a super cute, travel friendly brush holder .

Tag me in your post or DM them to me at @kyriasabah.


Until next time

Polý agape (lots of love) and stay cheerful :)


Share
Tweet
Pin
Share
No comments
Happy Sunday!

Today’s post is all about channeling your inner artist and put all your free time to use . If you recall I previously did a post “5 AWESOME ways to fill empty notebooks” and today’s post is just elaborate extract of the same . Art journals are a very modern and rustic way to display not only your art but stuff like your poetry or quotes too . Me and “@_theartisticside” collaborated to make this beautiful page . Keep reading to know how you can make one of your own 


You’ll need :


          1.      A notebook . ( You don’t necessarily need an art journal )
          2.     Glue
          3.     Scissors
          4.     Paint , sketch pen (or any art supply , we used water color )
          5.     Magazines , newspaper .


Let’s go !

          1.   Plan out what color palette you want to play with. It always gives a better visual if you have a three color scheme. As I love pastels I went with pink, grey and blue.

         2.    Allot one sheet to the quote/poem and the other for an abstract collage .


      3.      Paint to make the back ground for your text . A beautiful background is always a great start .


Add caption


          4.      Flip through magazines, newspapers and any picture filled sheet to find images or       text matching your color scheme.

          5 .     Cut them out and place them on the page, playing with whatever feels right .

         6.     Paste the collage bits in place .


7 .      Write down your poem / quote directly or on a separate paper and secure. 


8.      VOILA ,  you have a master piece ! This hardly takes half an hour to make and is such a fun activity . 


To see other such art journal entries follow my sister  “@_theartisticside” . 


  Until next time

 Polý agape (lots of love) and stay cheerful
 :)


Share
Tweet
Pin
Share
6 comments

Hello Kyfam !

Today’s post has to be my most favorite DIY of all time because lapel pins are all over the place and buying a single piece is so pricey . I of course wanted some pins for myself and chose the inexpensive way and made some .

Let's start   

You’ll need :


Things you'll need

1 . Print out or draw any fun symbols or icons you love .Mine happen to revolve around food :P

2. Get coloring . If you got a color print out you save this step but, I find it more relate able when you color it yourself .


3. Trace the outline of your picture onto the foam sheets and cut the sheet out .

4.Glue your picture onto the foam sheet . After the glue dries , give a glue coat on top as well to give a sheer finish (provided your glue dries clear ).


5. Flip your foam sheet around and add a generous dollop of hot glue to secure the safety pin . If you don’t happen to have a hot glue gun , use a really strong glue .


There you go ! You have these personalized super cute pins , and now you can make as many you want and flaunt this accessory on your backpacks , pencil cases , shoes and jackets .


   Until next time

  Polý agape (lots of love) and stay cheerful :)


Share
Tweet
Pin
Share
7 comments
Older Posts

Labels

Beauty DIY Fashion Lifestyle Make it work Modest Fashion My Stories Skin care travel

Blog Archive

  • ▼  2020 (2)
    • ▼  March (1)
      • A trip to Yasmeen Farms | Read More
    • ►  February (1)
  • ►  2019 (5)
    • ►  August (1)
    • ►  July (2)
    • ►  February (1)
    • ►  January (1)
  • ►  2018 (24)
    • ►  November (2)
    • ►  October (3)
    • ►  September (1)
    • ►  August (1)
    • ►  July (2)
    • ►  June (3)
    • ►  May (1)
    • ►  April (2)
    • ►  March (3)
    • ►  February (3)
    • ►  January (3)
  • ►  2017 (58)
    • ►  December (4)
    • ►  November (3)
    • ►  October (3)
    • ►  September (4)
    • ►  August (4)
    • ►  July (3)
    • ►  June (4)
    • ►  May (6)
    • ►  April (9)
    • ►  March (5)
    • ►  February (7)
    • ►  January (6)
  • ►  2016 (22)
    • ►  December (11)
    • ►  November (8)
    • ►  October (3)

Total Pageviews

@kyriasabah
Kyria Sabah

Pages

  • Home
  • About
  • Contact

Created with by BeautyTemplates | Distributed By Gooyaabi Templates