facebook twitter instagram
  • Home
  • About
Powered by Blogger.

                               kyriasabah

    • Home
    • ABOUT
    • CONTACT

I have been practising this for the past four months and my skin has never been this clear and breakout free. My face was prone to a lot of breakouts and I had to double up on my concealer to hide the redness. However I stumbled upon this DIY mask/scrub and thought it giving it a try. 
The entire concept is to avoid using chemicals on your face as much as you can. The one constant dose of chemical to my skin was my face wash so, I decided to put it away and use a natural face wash instead. There are a lot of brands claiming to be made of 100% percent natural products. However I was not satisfied and decided to make one myself.
You’ll Need :
      1.       Gram Flour.
      2.     Multani Mitti .
      3.     Mixing Bowl.
Steps :
      1.       Take equal amounts of gram flour and multani mitti . It’s very essential to do so.    The consistency does not come right if not equally proportioned.
      2.     Mix them well and store in a container.  
     3.     To apply :dampen your face, take come powder mixture on your fingers and apply        in circular motion.
     4 .    This can be immediately washed (like a face wash) or keep till the mask dies (approx 2 minutes) and then wash with cold water.
       5.     If you have dry skin like I do, I suggest you to moisturize your face after the mask as it can get a little dry.

Ever since I have started using this regularly I have N O breakouts! It worked really well for me. I prefer making small amounts of the mixture (1 tbsp each) at one time. That way it is completely used.


Share
Tweet
Pin
Share
No comments


Looking like a million bucks doesn’t necessarily need spending the same. My entire wardrobe doesn’t have any over the top priced piece . The key to dressing well is all in the pairing. How you pair the pieces, the color palette and accessories.

1. Color Palette : One word solution “Neutrals” . Bright and out there colors only look good at parties and on the runway .Whites , Black & Pastels will instantly up any piece .

 2. Ignore Trends : They change almost by the hour , instead focus on defining your own individual style. Only wear what looks good on you .

3.Thrift It : Don’t worry about where you shop from , the important thing is whether  the item fits , is flattering and is a good color . Thrift stores can be a huge , mostly untapped resource . Altering and mending  them can convert them into staples .

4.Shop off season : Whenever  there is an end of the season sale , it is your time to raid . Season clothes get very pricey so , shopping for them of season is going to save you some bucks .

5. Minimal Prints : Always opt for minimal prints , clashing prints or wearing heavy prints on the top as well as bottom is not very pleasing to the eye.

6.Dainty Jewelry : When chosen and styled thoughtfully , it can elevate any outfit. Opt for clear crystals over plastic gemstones and choose darker metals over excessively shiny ones . For a classic look , add a metal or leather watch . Jewelry is the ultimate statement and conversation piece.  

Current Crush : Celeste minimal rings . 

RINGS


7.Points for Points : Flats and heels that are pointed have a look that screams expensive ! I've written a post all about shoes click here to check it out .

8.Shoes = Bag : Having your shoes and bag of the same color gives a well coordinated and polished look to your outfit .

P.S : The inspiration for this post was from a game I played with my cousins and this is what it looked like (Haha)  .


Until next time
Polý agape (lots of love) and stay cheerful :)


Share
Tweet
Pin
Share
1 comments


Not many know this part of me , I don’t speak about this much . But , this incident changed me so much and made me aware of so many things I was ungrateful and ignorant of , I realized I should. 

Dated back to  summer break 2011. It was the month of June and everyone was indulged in chores . I got done with mine and went to the kitchen to check on the eggs. My mom kept them for boiling in a pressure cooker ( apparently it’s a speedy process ) . She had asked me to turn the stove off , pull the whistle to release the pressure and then take the eggs out to cool . I did the same , except I didn’t release the pressure completely ( in haste of-course ).


What followed happened in a matter of seconds and happened so fast I couldn’t prevent it . As a result of exerted pressure the lid bounced off and stuck to my face and the boiling water poured on as well . I was a little agile in removing the lid off my cheek but the hot boiling water was  unavoidable . Thanks to the cooker’s lid the water poured only on the left side of my face , I screamed . My aunt rushed to help .

First aid ? Colgate as it would prevent blisters and give a cooling effect  . The pain was unbearable I had to sit in front of an air cooler so that I didn’t feel the burn as much . It was torturous . Little did I know this pain was only physical , what I had to go through later would be worse . We rushed to the hospital as soon as my dad came .

The first hospital redirected us as they couldn’t treat this kind of burns. On reaching the second hospital there was huge queue , I felt even more miserable . But , the people were kind enough to let me go first . The doctor first checked if my eyes were fine as I wore contact lens , then rushed me to the emergency room  . I was nervous , scared . They nursed my burn and consoled me telling the burning would reduced but the scar would remain faintly .

 I lost hope . On knowing that I won’t be the same again . Luckily I had my holidays going on so I was mostly at home ,slightly sobbing  looking at old pictures. Every trip to the mall or just a step outside was a terror , all those weird questioning eyes , second looks and finger points . Everything was adding to my  misery . The ointment tube got empty and the wound wasn’t making any progress yet . Disappointed again , me and my family left for pilgrimage . This was pre-planned and at that point it felt like the only good thing happening .

On reaching there and on the sight of Kaabah my knees felt weak , I had been here many times but , this time I had something I really needed to pray for .It’s true a person remembers god most only in pain . It’s sad but the truth . For my scar to heal and my families’ well being is all I prayed for .

As we were in Mecca we had access to abundant Zam-Zam . I  washed my wound with it everyday . One fine day when I was washing my wound I felt a little peel . My skin was loosening , I gently tugged onto the peel and gradually a major part of the skin was off . Beneath which was my normal skin . My happiness knew no bounds , I fell in Sujood sobbing and thanking Allah . The next day the remaining skin had shed off and now I was back to how I looked before . My miracle happened !

I don’t know if it was the after-effect of the ointment or ZamZam itself .But , I sure do believe this is my miracle . It happened as a result my supplications . From this event onward my faith has only strengthened and has made me acknowledge every small blessing in life .


We all just ramble about things we don’t have instead of counting our blessings . Thank the lord for keeping us healthy and for all the tiny good things in life . 

Count your blessings !
Until next time
Polý agape (lots of love) and stay cheerful :)


Share
Tweet
Pin
Share
8 comments


Business and casual? Quite the contrary isn’t it but, it is the best way to look effortless, stay comfortable and yet meet the ‘formal’ dress code .
Being professional isn’t just by wearing corporate attires. You can wear a maxi dress and continue to look polished, conservative and good looking all together. It keeps you covered but still feels so light and airy. As I am uncomfortable with wearing pant suits so a maxi dress is a savior .

You can dress it up with an outerwear to give you a more formal and professional look.
     1.  Cover your arms and shoulders with a fitted shape: I tend to like wearing shrugs with maxi dresses on the weekend, but that can also look casual. For the office I would try it with a shrunken blazer or perhaps a fitted blouse. You want to add structure . 
FORMAL MAXI DRESS

     2. Color blocking in key :  Always opt a one-color maxi dress and pair it with a three-quarter or long-sleeved blazer. For example, your maxi dress is black, you can pair your blazer in pastels or any bright color.
If you wear maxi dresses with prints and other motifs, black or white blazers are better choices.

 
      3 . Dress it up with accessories. A skinny patent belt, a delicate necklace, or a high quality statement necklace — all of these things can go a long way. Other than that I am loving dainty rings , they add a very feminine touch to the assemble .


This dress is buttoned all the way in the center, a very unique take to maxi dresses. The deep navy blue gives a very royal look to it. For adding the formal touch I paired it with a pastel creamish pink blazer ( you all know I am obsessed with this color )  . Accessorizing with dainty rings and slip ons .

Maxi Dress – Splash ( lifestyle stores )

Blazer - Being Human ( Woman).

Rings – Clesente ( local brand ) & Forever 21 .

Slip ons – Bata .


Until next time
Polý agape (lots of love) and stay cheerful :)


Share
Tweet
Pin
Share
5 comments


Which filters do I use , How do I edit my photos , Which editing apps do I  use , How to maintain a feed ,Which planning app do I use . Are a few very frequently asked questions. So , here is a post answering all of those .


For starters this is how my feed looks like right now . Follow me there if you haven’t already  INSTAGRAM ! ( self promo :P )


 I try to keep an alternating theme so as to not have all portraits clogged together . Hence I alternate between posting a portrait and a product/random shot . I personally like it this way , it gives my feed a variety and doesn’t look cluttered . 

As for the filters , for your feed to look even you need to find ‘ your filter’ . A filter that meets your aesthetics and will suit most of your pictures. Apply this filter to all your images , alter the depth of filter depending on the picture of course but , this will give your feed an even look .

Today I’ll show you guys how I edited this picture .


My editing process isn’t too elaborate I just play around with two apps . VSCO and Lightroom .
I added a video as it is much easier to understand it that way .
      1.      I head to lightroom first to tweak the exposure a bit if the picture is a little dull .
     2.  In VSCO cam I use the HB1/HB2 filter depending on which one suits the photo better and then adjust the depth of the filter accordingly .
      3.     And done ! That’s pretty much it guys . 


You don’t necessarily have to use lightroom you can use snapseed or other apps for adjusting the brightness  . I love lightroom as it doesn’t mess with the resolution . 

  Until next time


 Polý agape (lots of love) and stay cheerful
 :)


Share
Tweet
Pin
Share
8 comments


Hey you ,

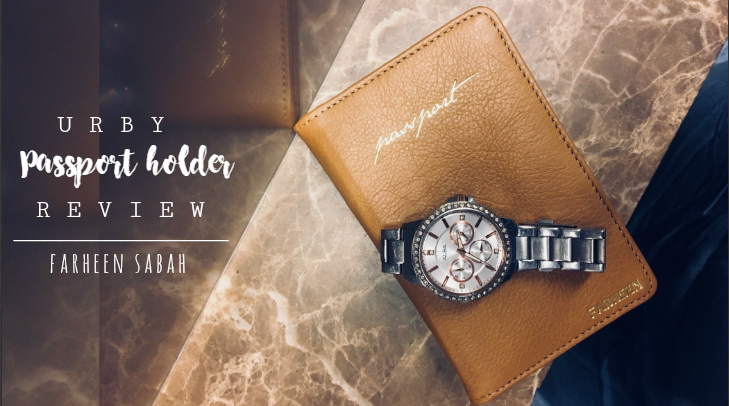
I just came back from a 11 day trip to Kuwait , most of you must have gotten all the updates and insights  from my instagram and snapchat stories .   A day before I left I did a live unboxing of a gorgeous passport holder from ‘URBY’. YOU GUYS IT WAS PERSONALISED ! I have always wanted one, with the my name on it being all fancy shancy ( XP ) . Anyway , I was travelling the very next day so it was an apt time to experience and review it .

The Look And Feel : It’s made of premium quality real leather and has a rich soft suede interior , does it need any more explanation to state that it’s beautiful ! It so rightly sized to fit in your pockets and easy to hold . The name in gold foiling adds to the luxury . The one I received was in the color ( Cognac Tan ) . All of this comes encased in a canvas draw string pouch .    

Paspport holder


passport holder


Utility : Generally passport holders just have a slide-in passport section but , the URBY passport holder provides you so much more :

·         An open section for travel documents ( I used this for my boarding pass)  
·         3 vertical access card slots .
·         A pocket for other cards or quick cash .
·         And an external rear slot  for foreign currency & more. 

It is made to carter to your instincts , is equipped to hold your most essential document as well as all other travel documents together in one place  . Making the trip easy and elegant .

Inside Insight 
Slots for cards and additional travel documents . 
Premium Leather 

External Slot 


 My experience :  All and all the passport holder is SUPER feasible . When it comes to 
having all your documents at one place it eliminates the need to ransack your bag for documents every time you are asked to produce them. The personalized cover makes it easy to identify your passport among others ( if you are travelling with a group ) . The only hassle I found is that if you filled all the slots it gets a little bulky , however that is rare to happen and having everything in one place obviously eradicates sleek .

P.S : Kyfam gets a discount code " KYRIA17 " . Hurry grab one click here .          Email the code and products to  support@urby.in . 


 Until next time

 Polý agape (lots of love) and stay cheerful
 :)


Share
Tweet
Pin
Share
No comments
Happy Sunday!

Today’s post is all about channeling your inner artist and put all your free time to use . If you recall I previously did a post “5 AWESOME ways to fill empty notebooks” and today’s post is just elaborate extract of the same . Art journals are a very modern and rustic way to display not only your art but stuff like your poetry or quotes too . Me and “@_theartisticside” collaborated to make this beautiful page . Keep reading to know how you can make one of your own 


You’ll need :


          1.      A notebook . ( You don’t necessarily need an art journal )
          2.     Glue
          3.     Scissors
          4.     Paint , sketch pen (or any art supply , we used water color )
          5.     Magazines , newspaper .


Let’s go !

          1.   Plan out what color palette you want to play with. It always gives a better visual if you have a three color scheme. As I love pastels I went with pink, grey and blue.

         2.    Allot one sheet to the quote/poem and the other for an abstract collage .


      3.      Paint to make the back ground for your text . A beautiful background is always a great start .


Add caption


          4.      Flip through magazines, newspapers and any picture filled sheet to find images or       text matching your color scheme.

          5 .     Cut them out and place them on the page, playing with whatever feels right .

         6.     Paste the collage bits in place .


7 .      Write down your poem / quote directly or on a separate paper and secure. 


8.      VOILA ,  you have a master piece ! This hardly takes half an hour to make and is such a fun activity . 


To see other such art journal entries follow my sister  “@_theartisticside” . 


  Until next time

 Polý agape (lots of love) and stay cheerful
 :)


Share
Tweet
Pin
Share
6 comments
Newer Posts
Older Posts

Labels

Beauty DIY Fashion Lifestyle Make it work Modest Fashion My Stories Skin care travel

Blog Archive

  • ▼  2020 (2)
    • ▼  March (1)
      • A trip to Yasmeen Farms | Read More
    • ►  February (1)
  • ►  2019 (5)
    • ►  August (1)
    • ►  July (2)
    • ►  February (1)
    • ►  January (1)
  • ►  2018 (24)
    • ►  November (2)
    • ►  October (3)
    • ►  September (1)
    • ►  August (1)
    • ►  July (2)
    • ►  June (3)
    • ►  May (1)
    • ►  April (2)
    • ►  March (3)
    • ►  February (3)
    • ►  January (3)
  • ►  2017 (58)
    • ►  December (4)
    • ►  November (3)
    • ►  October (3)
    • ►  September (4)
    • ►  August (4)
    • ►  July (3)
    • ►  June (4)
    • ►  May (6)
    • ►  April (9)
    • ►  March (5)
    • ►  February (7)
    • ►  January (6)
  • ►  2016 (22)
    • ►  December (11)
    • ►  November (8)
    • ►  October (3)

Total Pageviews

@kyriasabah
Kyria Sabah

Pages

  • Home
  • About
  • Contact

Created with by BeautyTemplates | Distributed By Gooyaabi Templates